
 Facebook
 X
X
 Pinterest
 Copy Link
A Home Addition: What to Consider Before Starting to Build
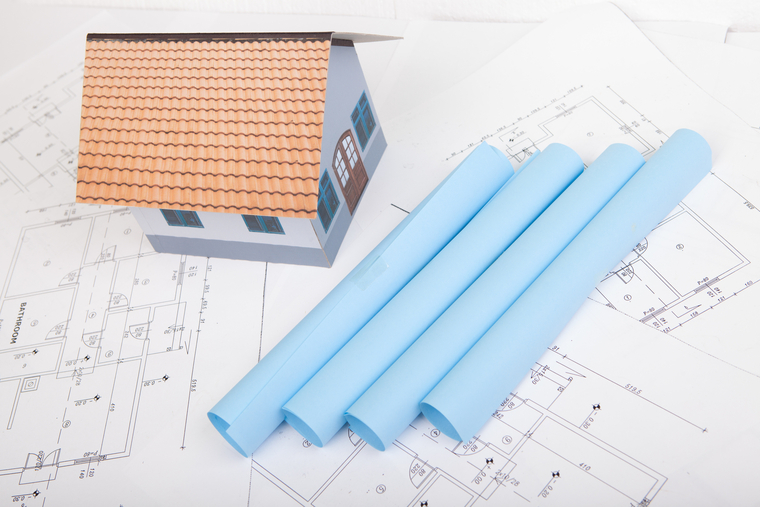

Adding on to your current home may be your best bet if you’re short on space, but you don’t want to move or can’t find another house in the area with all the qualities you’re seeking. It’s also an attractive option if the house you have is lacking just one significant element (a family room, another bedroom, a larger kitchen, a separate apartment, etc.).
On the other hand, even a modest addition can turn into a major construction project, with architects and contractors to manage, construction workers traipsing through your home, hammers pounding, and sawdust everywhere. And although new additions can be a very good investment, the cost per-square-foot is typically more than building a new home, and much more than buying a larger existing home.
Define your needs
To determine if an addition makes sense for your particular situation, start by defining exactly what it is you want and need. By focusing on core needs, you won’t get carried away with a wish list that can push the project out of reach financially.
If it’s a matter of needing more space, be specific. For example, instead of just jotting down “more kitchen space,” figure out just how much more space is going to make the difference, e.g., “150 square feet of floor space and six additional feet of counter space.”
If the addition will be for aging parents, consult with their doctors or an age-in-place expert to define exactly what they’ll require for living conditions, both now and over the next five to ten years.
Types of additions
Bump-out addition—“Bumping out” one of more walls to make a first floor room slightly larger is something most homeowners think about at one time or another. However, when you consider the work required, and the limited amount of space created, it often figures to be one of your most expensive approaches.
First floor addition—Adding a whole new room (or rooms) to the first floor of your home is one of the most common ways to add a family room, apartment or sunroom. But this approach can also take away yard space.
Dormer addition—For homes with steep rooflines, adding an upper floor dormer may be all that’s needed to transform an awkward space with limited headroom. The cost is affordable and, when done well, a dormer can also improve the curb-appeal of your house.
Second-story addition—For homes without an upper floor, adding a second story can double the size of the house without reducing surrounding yard space.
Garage addition—Building above the garage is ideal for a space that requires more privacy, such as a rentable apartment, a teen’s bedroom, guest bedroom, guest quarters, or a family bonus room.
Permits required
You’ll need a building permit to construct an addition—which will require professional blueprints. Your local building department will not only want to make sure that the addition adheres to the latest building codes, but also ensure it isn’t too tall for the neighborhood or positioned too close to the property line. Some building departments will also want to ask your neighbors for their input before giving you the go-ahead.
Requirements for a legal apartment
While the idea of having a renter that provides an additional stream of revenue may be enticing, the realities of building and renting a legal add-on apartment can be sobering. Among the things you’ll need to consider:
- Special permitting—Some communities don’t like the idea of “mother-in-law” units and therefore have regulations against it, or zone-approval requirements.
- Separate utilities—In many cities, you can’t charge a tenant for heat, electricity, and water unless utilities are separated from the rest of the house (and separately controlled by the tenant).
- ADU Requirements—When building an “accessory dwelling unit” (the formal name for a second dwelling located on a property where a primary residence already exists), building codes often contain special requirements regarding emergency exists, windows, ceiling height, off-street parking spaces, the location of main entrances, the number of bedrooms, and more.
In addition, renters have special rights while landlords have added responsibilities. You’ll need to learn those rights and responsibilities and be prepared to adhere to them.
Average costs
The cost to construct an addition depends on a wide variety of factors, such as the quality of materials used, the laborers doing the work, the type of addition and its size, the age of your house and its current condition. For ballpark purposes, however, you can figure on spending about $200 per square food if your home is located in a more expensive real estate area, or about $100 per food in a lower-priced market.
You might be wondering how much of that money might the project return if you were to sell the home a couple years later? The answer to that question depends on the aforementioned details; but the average “recoup” rate for a family-room addition is typically more than 80 percent.
The bottom line
While you should certainly research the existing-home marketplace before hiring an architect to map out the plans, building an addition onto your current home can be a great way to expand your living quarters, customize your home, and remain in the same neighborhood.
How to Get Through the ‘Punch List’ Stage of Your Remodel
Punch lists are usually made continuously by your construction manager throughout the project to avoid a lengthy list at the end of the project. However, the time when homeowners are involved is usually toward the end, right around the time when you’re able to use your newly remodeled space again. The punch list ensures that both you and your building professional agree that the project is completed. Typically, a signed-off punch list also ensures that the builder will be paid any remaining money owed by the homeowner, so this goes hand in hand with both parties agreeing that the project is complete.
It’s important to keep track of any items you find by adding them to a punch list as well as noting them throughout the house with a small piece of painter’s tape (not duct tape or electrical tape, which could damage finishes). This makes it easier on your memory as well as on your contractor. No one has to go hunting for that one corner with the ding in the drywall.
Punch lists are normal for almost all contractors. No matter how much protective product your remodeler lays down, no matter how good the painters and plumbers and trim carpenters are, there is bound to be at least one thing that will need to be taken care of at the end of the day. And, just like nearly every other aspect of remodeling and home building, how your building professional will resolve punch items varies based on where you live, what type of work your contractor is doing, how big the firm is and so on.
Be sure to check out your contract (take a look at any sections containing the words “substantial completion,” “inspection” or “warranty”) for information on how your contractor handles these issues. If you’re still unsure about issues such as costs associated with punch lists, how quickly punch items are resolved or whether anything is too small to punch, clear the air by having a conversation with your contractor.

Punch List 1: Jamie Keskin Design, original photo on Houzz
Paint
Let’s start with paint. Mistakes involving paint are typically the easiest for homeowners and pros to spot, primarily because paint is so aesthetic. If your walls are a different color than the one you selected, that should be pretty easy to pick up on.
However, there are other, smaller details that can be overlooked. One of my best painters once taught me to check the paint on woodwork with my hands instead of my eyes.
Walk up to your trim and cabinetry, look the other way and run your hand over it. Is it rough or bumpy? Can you feel any blemishes, paint drops or brush strokes? Does the finish make you grimace? If you answer “yes” to any of the previous questions, add this to your punch list of “to-do’s.”
Keep your eyes open for sheen variances. Is one spot of the wall shinier or duller than the rest? Also, note any cut-ins. Is the paint line where the wall meets the ceiling straight?
Depending on how many paint punch items are found, the paint crew may have to touch up a couple of spots on a wall here or there, or it may need to repaint entire sections. Again, this all depends on your contractor. Repainting entire rooms could constitute a change order for some, while others see it as a warranty item. Communication is key in determining where your builder stands on these issues.

Punch List 2: Rafe Churchill: Traditional Houses, original photo on Houzz
Sheetrock
Sheetrock (also known as tape, bed and texture) is another aesthetic finish that can be pretty easy to punch (both in the punch list sense and in the physical sense).
One of the best tips I’ve learned is that Sheetrock is easiest to punch after the paint primer has gone up but before the actual paint color hits the walls. Dings, dips, crooked edges and texture inconsistencies stand out like a sore thumb.
So ask your construction manager whether you can stop by after primer is applied. With your blue tape handy, walk through the construction area and take a look. Turn the lights on and inspect texture. (Is it too heavy in some places or too light in others? If you selected a smooth texture, are there any bumps that stand out?) Take a look at wall corners. (Are they straight and square from bottom to top?) Scan walls and ceilings for scratches and dents.
I’ve got to take a second here to make a small point: I know that every part of your home is important and worth time and attention. But consider this: Is a ding in a bottom corner of a coat closet really worth the same as one at eye-level in a kitchen?
I’m not saying that your contractor shouldn’t put time and effort into making your house your dream home, but if you feel like you’re getting carried away with the blue tape, take a step back and reevaluate. I can promise you that your dinner guests aren’t going to get on their hands and knees and inspect the Sheetrock in the corner of your pantry. And if they do, that’s another conversation entirely.

Punch List 3: Lauren Jacobsen Interior Design, original photo on Houzz
Tile
Like paint, tile can be inspected by sight and touch. Take a minute to make sure that everything looks flat and level, and that grout lines stay a consistent size. Then, if the tile is on the floor, take your shoes and socks off and walk around to make sure everything feels nice.
A creative tip I picked up from a homeowner is to walk throughout the house bouncing a tennis ball. Anywhere the ball hits the tile and makes a hollow sound is a place you’ll want to tag with tape. Tiles that aren’t well-secured will sound hollow and could lead to cracks or loose tiles in the future. Whether you do it during the punch phase or later when the tiles come loose or crack, the tiles will need to be replaced.
I’ve worked with several customers who decide that a loose tile in a corner somewhere isn’t worth the effort. I’m not saying to just throw in the towel on little things like a loose tile, but in the end, it is your house. If you don’t want anyone coming back to fix it and you can live with it, that’s perfectly fine too.

Punch List 4: Best Builders ltd, original photo on Houzz
Electrical, Audio and Video
Punching electrical, audio and video work is a lot less visual than some of the other finishes we’ve covered so far. With electrical and A/V, you’ll want to turn everything on and off. And then turn it on and off again. And then do this one more time.
Then, turn everything on and leave it on for a while. (This makes sure that lights don’t “freak out” when they’re on for extended periods of time.) Next, test the dimmer switches to make sure they dim correctly. Dimmers that aren’t properly paired to the lighting source can cause flickering. (Strobe lights can be cool, just not in your kitchen.)
If you really want to go above and beyond, test to make sure all the outlets are functional, and press the buttons on the GFI outlets — the outlets in wet areas like bathrooms or kitchens — to ensure that they trip (cut off the electricity) as they’re supposed to.
For appliances, make sure you have all the pieces that came with them and the warranty materials (all that paperwork that comes in the box). This is super important, as having the warranty information will be useful for any service you may need for your appliances in the future.
As with all other punch items, mark them with blue tape (if you can reach them; no need to strain yourself to put tape on a flickering can light in a 20-foot ceiling) and add them to your list.

Punch List 5: Kasper Custom Remodeling, LLC, original photo on Houzz
Plumbing
Like electrical, plumbing isn’t the easiest to check visually. There are a few things you can see, like scratches in the finish or straightness of plumbing fixtures, but there’s a lot behind the scenes that might only come to surface after use.
Turn on your hot water and let it run to make sure it gets hot, and turn on the cold water to make sure it stays cold. (It’s not unheard of to have the cold and hot switched.)
Plug your sink, fill it to the top and then drain it. This tests two things: 1) that the drain stopper works and 2) that there aren’t any leaks in the plumbing under the sink. The added pressure of all of the water leaving the sink at once tests the plumbing in a way that a normal stream of water can’t. You can do the same thing in your bathtub. Another good test for a tub is to fill it up to the overflow hole to make sure the overflow is connected properly.
With mechanical punch items such as plumbing and electrical, it’s likely that your building professional will try to lump all the punch items into one visit. This saves money and time. So if you notice that your toilet has hot water (it’s happened!) or a bulb in a closet is flickering and it’s not being attended to immediately, fear not! Your contractor may just be making sure to have a comprehensive list before calling in the cavalry to get it fixed.

Punch List 6: Decotick, original photo on Houzz
I know this all may sound like a lot of work. You may be thinking, “Isn’t this why I hired a general contractor or full-service builder in the first place?” And you’re absolutely right. But it’s my experience that homeowners like to get in on the action sometimes, and this is a great, productive way to do so.
Plus, everyone’s human. No matter how top-notch your remodeler or builder is, there is a chance (even if it’s just a .00001 percent chance) that something may be overlooked. Having a second set of eyes to make sure everything is up to their standards and yours doesn’t do anyone any harm. Now, get punching.
The 4 Phases of Remodeling: The Midproject Crisis

We recently covered the ins and outs of what I refer to as the Honeymoon Phase of construction. Next up is a stage similar to a concept most everyone is familiar with: the Midlife Crisis. (Whether you’ve experienced one or not is an entirely different story.) It often comes with questions like, “What am I doing? Where am I going? What is the meaning of life?”

Midproject 1: J Design Group – Interior Designers Miami – Modern, original photo on Houzz
Likewise, the second phase of a home remodel, which I fondly refer to as the Midproject Crisis, is paired with parallel questions: What’s my contractor doing? Are we still moving forward as planned? Was this really all worth it? And of course: What is the meaning of life?
Fear not: Your contractor is working hard, your project is moving forward and, yes, your decision to renovate your home is, and will be, worth it. I can’t really speak about the meaning of life, but I can speak about the experiences of homeowners and remodelers during this period of a remodel.
Related: The Reality of Living Through a Remodel

Midproject 2: Vivid Snaps Photography, original photo on Houzz
Typically, once demolition and framing is finished (the Honeymoon Phase) and before sheetrock is put up, mechanicals will begin. (This probably is referred to as “mechanical rough-in” or “mechanical rough” by your contractor.) Mechanicals refer to the guts of the house: electrical; plumbing; and heating, venting and air conditioning (HVAC). Like our own guts, most of the work done during mechanicals occurs behind the scenes.
So what is going on behind the scenes? Let’s break it down by type of work:

Midproject 3: Janet Brooks Design, original photo on Houzz
Electrical. The groundwork for all new light fixtures, outlets, switches and appliances will be done during this phase. New wiring will be run in the walls and ceilings, electrical boxes will be installed for future fixtures, and electrical panels may be upgraded so they can handle heavier loads (this is especially prevalent in remodels where appliances are added). At this point, electricians are making sure that everything that will need power will have access to it and meet your municipality’s building code.
Plumbing. As with electrical, plumbing rough-in ensures that all plumbing fixtures, appliances and other water features will be supplied with water, gas (if your house uses natural gas) or both. So pipes may be moved or installed in new places, shower pans (the things that make sure the water stays in the shower) are installed and inspected, and gas lines may be moved, extended or even put in.
HVAC. Unlike electrical and plumbing, HVAC is the only mechanical where nearly all the work is completed during the rough-in stage. Pathways for new vents (for bath exhaust fans or kitchen vent hoods) are determined and vents are installed, air conditioning units may be replaced, and air return vents are located in appropriate positions.

Midproject 4: Melbourne Contemporary Kitchens, original photo on Houzz
All this sounds exciting, right? No doubt, it is. But the progress isn’t as visual as it is in the Honeymoon Phase. Since everything occurs behind walls, under foundation or in attics, the big “wow” just isn’t there like it is when everything is torn apart.
It’s around this time that I’ve often seen homeowners concerned about progress. Yes, plumbers are there, but where are the new sinks? Why isn’t there a single light fixture installed yet? Is the HVAC guy even working, or is he just taking a nap in the attic?
The other contributing factor to the crisis is the fact that any speed bumps that crop up during this phase take a bit more time to resolve. Overall, the placement of existing framing is the biggest obstacle in mechanical rough-ins.
If your plans specify that there is going to be a can light in Location A, but Location A has a structural beam directly above it — no can do. Or say your architect has designated a toilet to be mounted on the wall instead of on the ground, but existing wall framing prevents this from being a viable option. Back to the drawing board. Or maybe your HVAC contractor needs to be able to provide ductwork to a new vent hood location in your kitchen, but there is no open attic space to place the ducts. Time to think through the alternatives.
Another obstacle, which is less common but should still be noted, is the condition of existing mechanicals. Any wiring, plumbing or venting that is found to be damaged, dangerous or just not up to par with your municipality’s building code will likely need to be remedied.
And don’t even get me started on inspections. If your job is permitted, inspections for mechanicals will occur during this stage. City building inspectors are (at least where I’m from) well known for being thorough. If you don’t have everything just right (which ultimately is good, because they’re looking out for your safety), they will not hesitate to make your contractor fix the issue before any work can continue.

Midproject 5: Kasper Custom Remodeling, LLC, original photo on Houzz
And finally, don’t forget to communicate with your remodeler. If you don’t understand something about mechanical rough-in (which is common), ask. If you’re concerned about the placement of pipes or wiring, say something. If you want an update on project status, request one.
I know it may be tempting to ask for advice from your neighbors who remodeled their house last year or your friend whose cousin’s husband is an architect, but in the end, the person with the most knowledge about your project is your building professional. See if you can get on your contractor’s schedule for a recurring biweekly meeting. It will help make the Midproject Crisis less of a crisis and more of an extended honeymoon.
So we’re halfway there. What’s next? Is the light at the end of the remodeling tunnel finally visible? When will your house start to look like a home again? What is the meaning of life? (I’ll tell you one last time — I can’t help with the meaning of life!)
But for more information on the next phase of a remodel, look for the next installment in this series: the Renewal of Vows.
The 4 Phases of Remodeling: The Renewal of Vows

Passing the midway point of a remodel can be an exciting time. After weeks (or months, but hopefully not years) of being in a state of disarray, things finally start to feel as if they’re coming together.
You’ve experienced the fast-paced bliss of the Honeymoon. You’ve trudged through the slowdown that comes with the Midproject Crisis. And now? Now you’re ready to gaze lovingly into your contractor’s eyes again.

Vows 1: Priority 1 Project Management, original photo on Houzz
Everything you’d hoped and dreamed about when you first envisioned your project is coming true, and you’re feeling ready to say “I do” all over again. It’s time for the remodeling phase I like to refer to as the Renewal of Vows.
You probably won’t hear your contractor refer to this phase as such (but how fun would that be?). Just as the Midproject Crisis is more commonly referred to as the mechanical rough-in stage, this phase has other, more industry-standard names. You will probably hear words like “finish out,” “trim out,” “mechanical trims” or “finishes.”
And, as you can probably guess, this phase is about finishing and beautifying the work that was started in the first couple of months. There’s a lot that may (or may not) be involved in the finish stage of your job, depending on your scope of work, but here’s a list of the most common steps that happen during this phase.

Vows 2: Traci Connell Interiors, original photo on Houzz
- Sheetrock. Holes made during rough-in will be patched, new Sheetrock will be put up at any new walls or ceilings, and texture will be applied to make your walls look like walls again.
- Trim carpentry. There are a few different types of trim that may be installed at this phase: baseboard (which runs along the joint where the bottom of a wall meets the floor), door and window casing (which is installed around the perimeters of doors and windows) and crown molding (which is run along the joint where the top of a wall meets the ceiling). Trim is purely optional — some more contemporary designs forgo it entirely — but it is meant to create a finished, unified look.

Vows 3: TOTAL CONCEPTS, original photo on Houzz
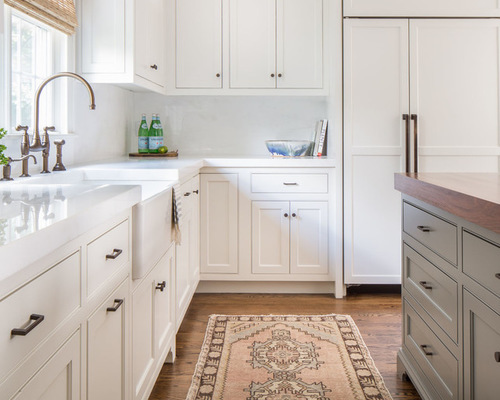
- Cabinetry. The installation of cabinetry is usually around the time when I see a little glimmer come back into a homeowner’s eyes. This is when the kitchen starts looking more like a kitchen, but it’s also when you can visualize how your other storage pieces, such as built-ins and bathroom cabinets, will change the function of your home.
- Related: Shop for Kitchen Cabinets
- Electrical and plumbing trim. This is the other big “wow” that comes with the finish-out phase. A master bathroom can start to look completed when tile and cabinetry is installed, but throw in a freestanding tub and a shower full of rain heads, handheld fixtures and a steam unit, and suddenly you’re not looking at a mostly done, unidentifiable space — you’re looking at your master bathroom.
The same goes for electrical items like decorative light fixtures or appliances. Seeing new stainless steel (or whatever your preferred finish is) appliances being brought into and installed in your kitchen make most people go starry-eyed and drool a little. No judgment here — I’ve done the same.

Vows 4: DKOR Interiors Inc. – Interior Designers Miami, FL, original photo on Houzz
- HVAC trim. I mentioned in the last installment that most HVAC work is done during the rough-in stage, so what is left? Essentially, all that needs to be done is the installation of vent covers and thermostats and maybe a little tweaking of the air-conditioning system. Nothing too exciting, but it should be noted nonetheless.
- Miscellaneous. Like I said, there is a lot that can be going on during the trim-out stage. Flooring — such as carpet, wood, tile or laminate — will be installed. (Flooring installers are known for insisting that they be the absolute last people to work on a house.)
Tile will go up in showers and as backsplashes. Countertops will go in. Priming and painting of walls, ceilings, trim and cabinetry will be completed. A little landscaping may even be done.

Vows 5: Viyet Luxury Consignment, original photo on Houzz
There are a million moving parts during the mechanical finishes phase. And I admit, as a homeowner and general contractor, this is exciting to see.
Just like during the Honeymoon, a lot of visibly quantifiable work is being completed. Only this time, instead of things being torn up and thrown out, they’re being brought in and installed. The puzzle pieces are finally fitting together, and you are starting to see the big picture. (Dreamy sigh.)
I’ve harped repeatedly about how communication is key, and this still rings true during the Renewal of Vows stage. But patience is also important.
As you see new things being carried in and installed, it can be so tempting to begin moving back into your new space or using your new kitchen. But your contractor may still need some time and space to work.
There are last-minute items that will ultimately guarantee your satisfaction that need to be taken care of before you and your family can begin enjoying your new remodel. So hang in there, and your patience will be rewarded.

Vows 6: Jay Jeffers, original photo on Houzz
You may be thinking: There can’t be anything left, can there? That’s it, right? Everything is installed, the house looks like a house again, time to move in and get settled. Not so fast. You’re almost there. Find out what final bits and pieces are involved in the end phase of a remodel, what I like to call the Happily Ever After stage.
The 4 Phases of Remodeling: Happily Ever After
This fairy-tale phase of a home remodel is the tail end of any major project. The Honeymoon has come and gone. The Midproject Crisis has thankfully passed. The Renewal of Vows has given you the strength you need to continue on, and now we’re finally, and gratefully, just about out of phases. It’s time to wrap up this series on the ups and downs of remodeling by detailing the final few steps that are taken to complete a home remodel. What I call the Happily Ever After phase.

Ever After 1: Sophie Metz Design, original photo on Houzz
Whether you have experienced it, known someone who has gone through it or have only read about it, you’re probably familiar with what it’s like to be in love. Emotions run the gamut of excitement, happiness, giddiness and contentedness (as well as a wide range of others). The person in love is likely to be gushing about her beau or his sweetheart to anyone who will listen. It’s a time when even the most cynical of people looks at the world through rose-tinted glasses.
Moving back into a house after remodeling can be a bit like being in love. Are you not excited to use all your new appliances or plumbing fixtures? (Hello, new bathtub!) Is there not a smidge of giddiness as you think about coming home to your pristine new bathroom, kitchen or living room? Don’t deny it — you’re probably even babbling to the barista at Starbucks about your new space.
During this Happily Ever After stage, finally, the work is done! At last, there are no more nail guns and saws and vacuums making noise in your house. After months of destruction and disarray, it’s time to move back in and enjoy your home, sweet home, for the rest of your days (or at least until you sell it or remodel again). And though most of this phase is just you at last having the chance to enjoy the fruit of your general contractor’s labor, there are a few odds and ends that your contractor will be taking care of to make sure your Happily Ever After really lasts forever.

Ever After 2: chadbourne + doss architects, original photo on Houzz
- Cleaning. This probably will happen before you move back into your home (or at least it should). Since day one of demolition, dust and debris have been thrown into the air and, much to your contractor’s chagrin, have crept into other places in the house that weren’t touched in the remodel. Now’s the time to do an all-inclusive clean. No, the cleaners won’t do your laundry for you, but they’ll do just about everything else, from polishing the floors to dusting the ceiling fans. The end-of-project clean is like a cleansing spa day for your home.
- Final walk-through. The last walk-through ensures that you are completely satisfied with everything — and I mean everything — in your home. This is where you will have the chance to sit down and bring up all the odds and ends that you feel need to be addressed. This can be anything from “this faucet isn’t on straight” to “there’s a scratch on the new fridge” to “my shower isn’t draining correctly.”
Contractors may vary on when they hold a final walk-through, but in my experience, it’s scheduled after the homeowners move back in and have a chance to use the new space. Your contractor should’ve caught just about everything during his or her own informal walk-throughs throughout the remodel, but sometimes there are items that just don’t come to the surface until a house is lived in.

Ever After 3: Collins & DuPont Design Group, original photo on Houzz
- Warranty begins. Most builders and remodelers have a warranty for their projects. The length and amount of coverage can vary, of course, but what remains constant is the promise to stand behind their work for any unforeseen circumstances that arise and need addressing. (Side note: If you’re looking at contractors right now, ask them about their warranty. This can be very telling of how they conduct their business. The more that contractors are willing to warrant their work — or the longer the warranty — the more effort they will put into getting the job done right the first time.)
For some contractors, the warranty formally begins after the final walk-through is hosted and the last payment is received. After that, some will stand behind any light fixtures that fizzle, appliances that break, tiles that come loose — you name it. In an ideal world, everything would work right the first time, and it would work right forever. In our world, however, there are bad manufacturing batches and recalls and oversights that may need to be taken care of. Fear not. If you have selected the right remodeler, these issues will be handled.
Related: How Builders Deal With Problems Beyond the Warranty

Ever After 4: Mark Hickman Homes, original photo on Houzz
What else is involved in the Happily Ever After? Absolutely nothing. Take a deep breath in, let it out, look around your new place and smile, knowing that it’s all yours, to have and to hold from this day forward, for better, for worse, for richer, for poorer, in sickness and in health, to love and to cherish till death do you part. You get the picture.
Your Go-To Guide for Painting Your Home’s Exterior

There’s nothing like a fresh paint job to punch up a house’s curb appeal. And hiring a professional to do it is the best way to get a superior result — and save you the headache of ladders, repairs and other hassles.

Exterior Paint 1: Fluidesign Studio, original photo on Houzz
Project: Working with a professional on painting your house’s exterior.
Why: Whether your house is wood-frame or shingle, stucco or brick, you’ll get knowledge, accuracy and efficiency by hiring a professional.

Exterior Paint 2: Butler Armsden Architects, original photo on Houzz
Whom to hire: Many painters do both interior and exterior projects. A painting contractor should be licensed and insured. You should obtain a written contract with details about the work to be done. Review the contract to make sure it’s clear which parts of your house’s exterior are to be painted, how long the project will take and how the contractor will be paid.
Cost: A cost estimate should include all labor and materials. Additional detail work, such as painting intricate trim or repairing surface imperfections as part of the preparation work, will usually increase the cost due to the extra time required.

Exterior Paint 3: Meyer Greeson Paullin Benson (MGPB), original photo on Houzz
Costs vary by region, size of the project and amount of detail work. Jeff Dupont, of Sound Painting Solutions in Seattle, says a typical range for his medium- to large-size exterior projects (a 1,200- to 1,700- square-foot house is his medium size) is $9,000 to $12,000. Dupont says his contracts have a warranty that includes any touchups needed due to their workmanship or material defects.
How long the project will take: Prepping and painting a house’s exterior usually takes several days, depending on the size of the house. Dupont says if only minimal prep work is needed, a single-story home will take two to three days, and a two-story house two to four days.

Exterior Paint 4: PK Atkins Photography, original photo on Houzz
First steps: Many painters visit the site for a free initial consultation to talk about the scope of the project, including giving an estimate of how much it will cost and how long it will take to complete. Benjamin Moore recommends walking each potential contractor around the house, outlining which areas will be painted (siding, trim, window frames, porches, doors).
During the project: After repairing holes and cracks in stucco surfaces and using wood filler to fix frame siding, the contractor will apply a primer. Two coats of latex paint are almost always used, but in some areas, such as the Northwest, an oil-based paint might be applied to tannin-rich cedar or redwood exteriors, to better seal the wood and prevent the tannin from bleeding through the primer, Dupont says. In areas where stucco, masonry and brick homes are prevalent, a durable latex acrylic elastomeric paint might be used — it stretches if cracks form underneath.

Exterior Paint 5: Everything Home, original photo on Houzz
Before painting begins, homeowners should remove patio furniture, potted plants and other outdoor accessories in the work area. In general, painters usually remove items like hose holders and mailboxes and replace them when done. Mari Hensley, of Kennedy Painting in St. Louis, says her company asks homeowners to take any fabric cushions on patio furniture inside during the project to prevent damage.
Color considerations: Some painters provide color swatches and consultation, while others expect homeowners to research color combinations on their own. Hensley says samples can be applied to surfaces upon a homeowner’s request. Most large paint companies have online exterior color guides.

Exterior Paint 6: Polhemus Savery DaSilva, original photo on Houzz
Sherwin-Williams has color suggestions based on region and style — from traditional or contemporary suburban to desert Southwest. Behr’s Colors Gallery lets users choose from cool, neutral and warm tones.
Things to consider: A reputable professional should have all the necessary supplies, so a homeowner is not expected to provide anything. If your house was built before 1978 and lead paint is suspected, be sure your painter is certified by the Environmental Protection Agency to handle lead. Even exteriors require certain procedures if lead is detected.
Best time to do this project: Summer is the most popular time of year for painting exteriors in regions with cold, wet winters. Even in mild-weather regions, spring and summer are best for tackling exterior paint jobs. Dupont says April to October is prime time for painting exteriors in the Northwest.
10 Home Projects That Need a Pro

If you are working on a DIY remodel, deciding whether to call in a specialty contractor to perform a specific task comes down to several areas you’ll need to consider:
Skill. Do you have the necessary skills to build a sound structure, and do it safely?
Scale. Is the size of the project one that you can handle in a reasonable amount of time?
Cost. When factoring in the value of your own time, can the project be completed for less cost by a professional? Do you have the tools you need?
Aesthetics. Can you finish the project attractively enough that you’re not sacrificing resale value? Would a rough grout joint or wallpaper seam bother you?
Learn more about the specific problem areas that often require professional help below.

Contractor 1: Weber + Studio Architects, original photo on Houzz
1. Structural elements. Beams, footers, headers etc. — these are the unglamorous and often hidden parts of a home that are critical to its long-term stability and safety. Don’t take chances with structural components. Everything should be drawn or approved by an engineer, whose specifications should be followed to the letter.

Contractor 2: Re:Vision Architecture, original photo on Houzz
2. Electrical. Here’s another one where safety and skill intersect. Poor wiring can be a safety hazard — just because you were able to wire something up and it worked, doesn’t mean you haven’t created a safety hazard. If you aren’t confident you have the knowledge to perform the needed work and assess the implications of your work on the rest of the circuit and panel, call in a professional.

Contractor 3: Jeffrey Dungan Architects, original photo on Houzz
3. Roofing. Here’s a good example of a project where even if you feel you have the skills to perform the task safely and properly, you may not be able to complete the project in a short enough period of time to avoid exposing your home to damage from rain. If you can’t get your roofing project done in a couple days, don’t start it. Even professionals can underestimate the time a project will take to complete, so you may want to double your estimate.
Related: Siding Contractors to Get the Job Done
4. Plumbing. A clogged drain line and a faucet that needs to be replaced are tasks that you know you can complete. Before you do either yourself, though, think about the true cost.
What is your time worth? Do you have the tools? If you end up renting a drain snake from the home center that doesn’t work when you get it home, and you need to make another trip before you even clear the drain, you may lose much of a precious Saturday.

Contractor 4: Buckminster Green LLC, original photo on Houzz
5. Insulation. Certain types of insulation, such as spray foam, should be left to the professionals. Many people assume that installing batt insulation like fiberglass is an easy project, but there is a lot of room for error here. If you leave gaps you can create spots that draw heat and moisture into your walls — a bad combination. Even if you do the job well, it’s messy work. Plus, insulation contractors get a much better deal on the material costs than you would, offsetting the labor savings of a DIY project.
6. Carpentry. Even if you have the skills to complete the project, professional carpenters will have the tools and experience to get the job done quickly. If you are trying to complete the project on a part-time basis, remember to factor in setup and cleanup time. Working a full day is often much more efficient than an hour here and there.

Contractor 5: Ike Kligerman Barkley, original photo on Houzz
7. Masonry. This is one that bridges all four factors — if there is a structural component to the masonry project (and there usually is), safety is a concern. The scale of projects involving stone, brick and concrete can be deceiving. Make sure you know what you’re getting into. Wrestling a heavy stone into place and making it look good takes years to master. When you factor in all of this, the cost of paying for good work can be a bargain.
8. Wallpaper. There isn’t much room for error here. You have to get it right the first time. You’re drawing attention to the wall by dressing it up, so it had better look good. You wouldn’t pay an arm and a leg for a beautiful fabric and then make a sloppy-looking dress, so don’t buy a gorgeous paper and put it up with misaligned seams and bad corners.

Contractor 6: Buckminster Green LLC, original photo on Houzz
9. Tile. The pace of tile installation is slower than that of wallpaper, and there is a lot of contemplation that goes into a good tile installation. If you aren’t experienced, you may discover something you should have thought about when it’s too late. You also want to prep correctly. Tiles are all different and require different approaches to installation. Your DIY tile floor may look good when it’s done, but can you be sure it will hold up and not crack in a year or two? If you are confident about that, go for it. If not, call a professional.
10. Painting. I know, it sounds ridiculous — if you can’t paint, what DIY project can you do? Keep in mind, I’m not here to stop you from painting your own house. Just consider that a good, lasting paint job takes a lot of prep work. Sometimes this can involve wall repair, scraping paint (which can be a health risk if it’s lead paint), priming and caulking over old finishes with various products. Depending on what you’re working with, you may need someone with more experience to help.
By Kenny Grono, Houzz
How to Combat the 5 Most Common Remodeling Monkey Wrenches

There’s a lot to think about, select and organize on a remodeling project, whether it’s a single room or a whole-house remodel. Small projects often have the same list of tasks as big projects, and the same potential for material selection and delivery to throw your schedule for a loop. Of course, anything can go wrong during a remodel, but some parts of your remodel will cause more difficulty than others.
Here’s what you should keep an extra-close eye on as you’re planning your remodel.

Monkey Wrenches 1: Garret Cord Werner Architects & Interior Designers, original photo on Houzz
1. Windows and exterior doors. Window decisions can be some of the most difficult in a project. Windows come in a variety of materials and colors, with hardware in different styles and colors and even an array of screen options. They also have wildly varying lead times. Vinyl windows can arrive in as little as two weeks, while some wood-clad and solid wood windows can take 10 weeks or more to arrive.
Generally, your contractor will install your windows before interior work takes place. And exterior trim and siding can’t be installed before the windows, so they can have a big schedule impact if they don’t arrive on time.
Best practice: Select your window brand early in the process, use the lead time to count backward from when the windows need to arrive and then finalize the order with your contractor at least two to three weeks ahead of that ordering deadline. Confirming things like jamb size, tempering, energy code compliance, egress, obscured glass selection and more can lengthen the process.

Monkey Wrenches 2: Ventana Construction LLC, original photo on Houzz
2. Cabinets. Similar to windows, cabinets affect a wide range of tradespeople who are lined up to work directly after their installation. Flooring, tile and countertop installations are all linked to the casework in kitchens and baths. Ordering cabinets requires multiple layers of design and selection, including decisions on the layout of the room; the function of doors, drawers and hardware; wood and paint; and crown molding. A field measure is also necessary.
Expect a floor plan and drawings showing how your cabinets will look straight on with complete measurements (also known as shop drawings). You’ll need to approve these before production can start.
Best practice: Narrow down the wood species and general style of the cabinets early on so that the biggest decisions are out of the way. Knowing the lead time from the cabinet shop is critical, and it doesn’t hurt to add an extra week to that to make sure your cabinets will arrive in time.
Related: How to Set Up Your Cabinets for the Best Storage

Monkey Wrenches 3: ART Design Build, original photo on Houzz
3. Plumbing fixtures. All of today’s retail and online plumbing fixture stores make it seem like getting plumbing fixtures in time for an installation is easy. It often is, but some fixtures and manufacturers have factory lead times and limited availability.
Shower valves and bathtubs are the two elements you usually need for a plumbing rough-in. The rough-in could happen the first week of a bathroom remodel or a couple of months into a larger project. The rest of the fixtures can come late, but selecting these two ahead of time will make it easier to get the rough plumbing in correctly. If you’re using stone or another solid-surface counter that has an undermount sink, you’ll need to have the sink and faucet onsite during the template process.
Best practice: Don’t wait until the bitter end to choose your plumbing fixtures. If you do, at least one is bound to not show up when you need it, or to come with an exorbitant cost for overnight delivery.

Monkey Wrenches 4: Contemporary Bathroom, original photo on Houzz
4. Tile. When you select tile, you have to consider more than just aesthetics. You also need to make sure that the material you select has all the pieces necessary for installation (bullnose, pencil liner etc). Consult your architect and the tile setter if you’re not sure what you need. Still, sometimes the tile that arrives isn’t quite right. On one of our recent bath projects, one of the selected tiles was switched for another material because the colors of the delivered tile were not as expected. The dimensions and colors may not exactly match the sample you saw in the showroom, particularly with natural stone and slate. But even factory-made tile can vary from one lot to another.
Best practice: Try to get a sample from your local tile supplier’s warehouse to make sure the stock that will be delivered is what you expect.

Monkey Wrenches 5: Noel Cross + Architects, original photo on Houzz
5. Flooring. The thickness of a flooring material affects many things, including the rough carpentry work that happens at the start of a project. If you want your floors to “plane out” (not have transitions up or down), making a definitive flooring decision is critical.
Many flooring materials, like wood and Marmoleum, have a lead time for arrival. Then these materials need to acclimate and adjust to the ambient temperature and humidity in the house. If flooring is installed without acclimating, it can expand or contract, causing gaps or bulging in the flooring. Usually four to five days are enough, but some products need two weeks of acclimation.
Carpeting can go in without acclimating at the very end of the project. However, interior millwork is installed in different ways, and there are different orders depending on whether you choose carpeting or some other flooring material.
Best practice: Choose your flooring before your project starts so that your contractor can make the surfaces plane out, and so that lead and acclimation times are not an issue.
